By Hannah Powling
Halloween is fast approaching, it’s just one more weekend away now! So what are you doing with your nails? They are the finishing touch to completely nail your whole look this year (excuse the pun); so here are some ideas for some inspiration, and easy how-to techniques to get yourself some spooky nails this Halloween.
GRADIENT NAILS
I think what makes this nail look Halloween-y to me are the colours used. I have gone for Gallery Grey by Mary Kay, a deep crimson Femme Fatale by L’Oreal Colour Riche and Black Knight by MoYou London. Use a disposable makeup sponge to get the best ombre effect.
1. Paint Nails with base coat, and then with the Mary Kay Grey as your base colour.
2. Once its dry, grab your makeup sponge and paint once again the Grey, Crimson, and Black stripes onto it.
3. Dab, dab, dab onto your nail and you will get a soft gradient (move your sponge ever so slightly up and down too to get a softer fade between the colours)
4. Clean up your fingers as you do get a little on your skin around the nails, using a cotton bud and nail polish remover.
5. Add your fave top coat and you’re done!

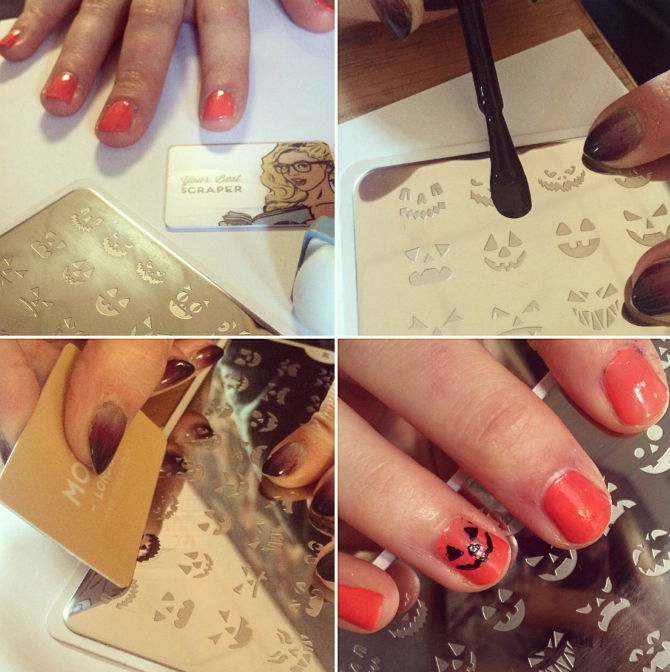
PUMPKIN NAILS
MoYou London are a nail art company that specialise in innovative nail stamping plates and polishes, too. They have the biggest selection of fabulous trend/season inspired nail art plates – and here; they have their Halloween plate. It features all kinds of pumpkin faces – all you need is an Orange Nail polish as your base, here I used Butter London in Tiddly and MoYou in Black Knight.
1. Paint all nails with your orange base
2. Using the Black, paint onto your plate, and scrape off excess by using MoYou’s little scraper.
3. Working quite quickly, grab your stamper and roll over your ghoulish stencil, quickly pressing onto the nail to transfer your pumpkin face design.
4. Add your fave top coat once they’re dry and you now have pumpkin nails.
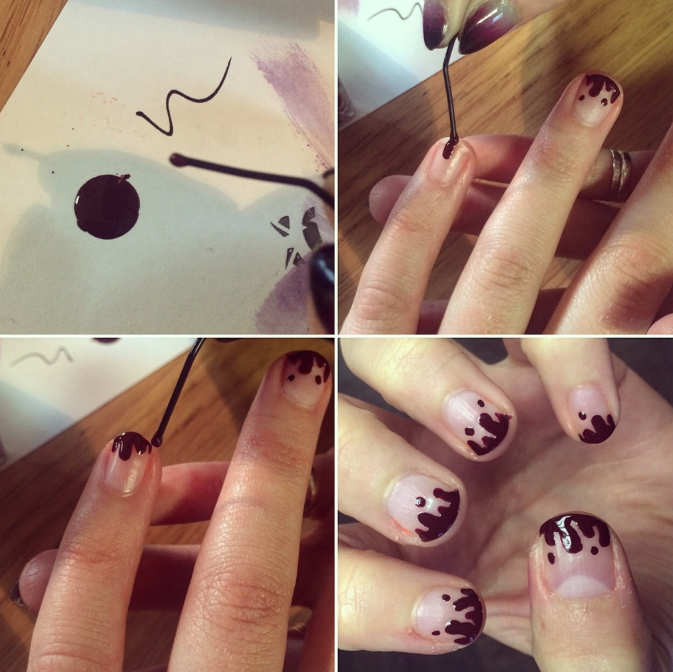
Blood Drip Nails
This one’s an easy one. It looks great on naked nails. So all you need is a good Blood Red shade – I have used Bourjois La Laque in Marron Show, and a dotting tool of some sort. I grabbed a paper clip to use for this occasion!
1. Base coat your nails, you could use a skin tone nail polish or just keep them clean.
2. Pop a little bit of your red polish onto a piece of paper to use to dip your dotting tool into, and using the natural drips that come off your tool; to build up the red and to make it ever so slightly 3D like.
3. Following a drip-like pattern, stick to the tips of the nails and build your drips slowly, with some drops above as shown below.
4. Wait for this to dry, add your favourite top coat and you’re finished.
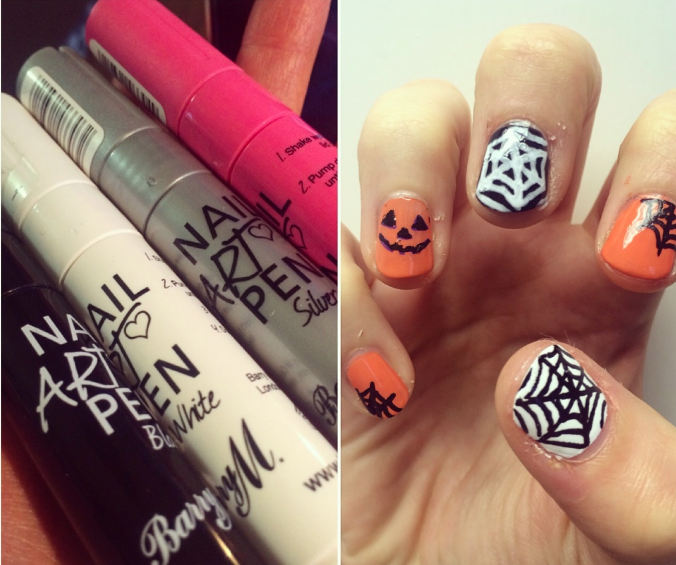
SPIDER WEB NAILS
These are a little fiddly, but these tools make it a lot easier to do; Barry M Nail Art Pens. These pens have a felt-tip nib so drawing on designs is made simple. They don’t look perfect; but hey that’s all the fun when it comes to dressing up for the Holiday!
1. Here I just quickly used a white base for the thumb, and once dry drew on a web-like design and once dry added on a top coat to seal it all in.
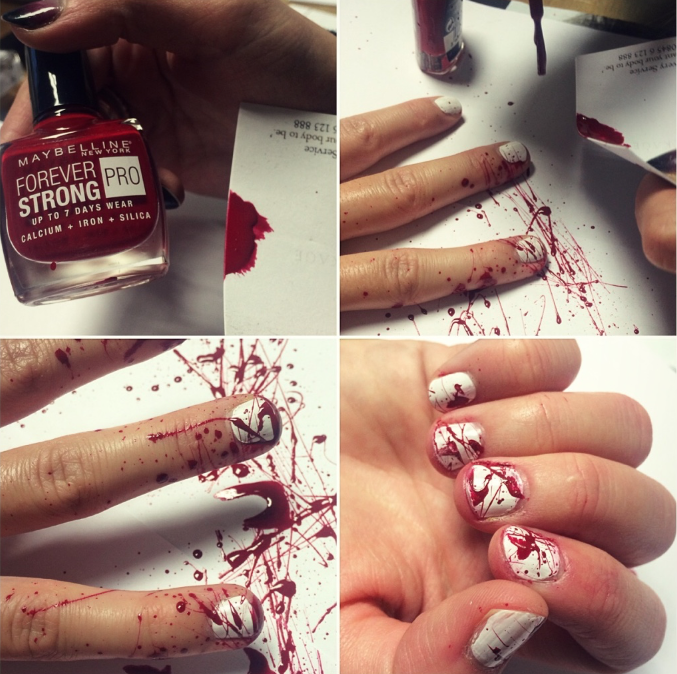
Blood Splattered Nails
Okay this one can get a little messy – but the outcome is so fun. For this I have used Bourjois LA Laque in White Spirit, and Maybelline Forver Strong Pro in Deep Red. I like the white as it is super dense and even just one coat is enough. The red made for a brilliant blood shade.
1. Painting all nails with white, allow to dry.
2. Grab something you can flick against with your red nail brush… I have simply used a little bit of card here. Do this on a surface you dont mind getting nail polish on! I have used a piece of white paper so I can throw away afterwards.
3. Flick nails with red, get messy, and go for it. (Warning: it does go slightly all over the place…)
4. We actually agreed that you could leave your fingertips blood splattered – as it would make for a cool costume addition and you could also be sure that your ‘blood’ wouldn’t budge all night!
5. Or – clean off all fingers using nail polish remover and apply a top coat.
–
Take a look at my step-by-step on how to create Zombie Eye Makeup / Lioness Makeup for Halloween.
–